

Is There Valorant For Mac
Can you play Valorant on Mac?
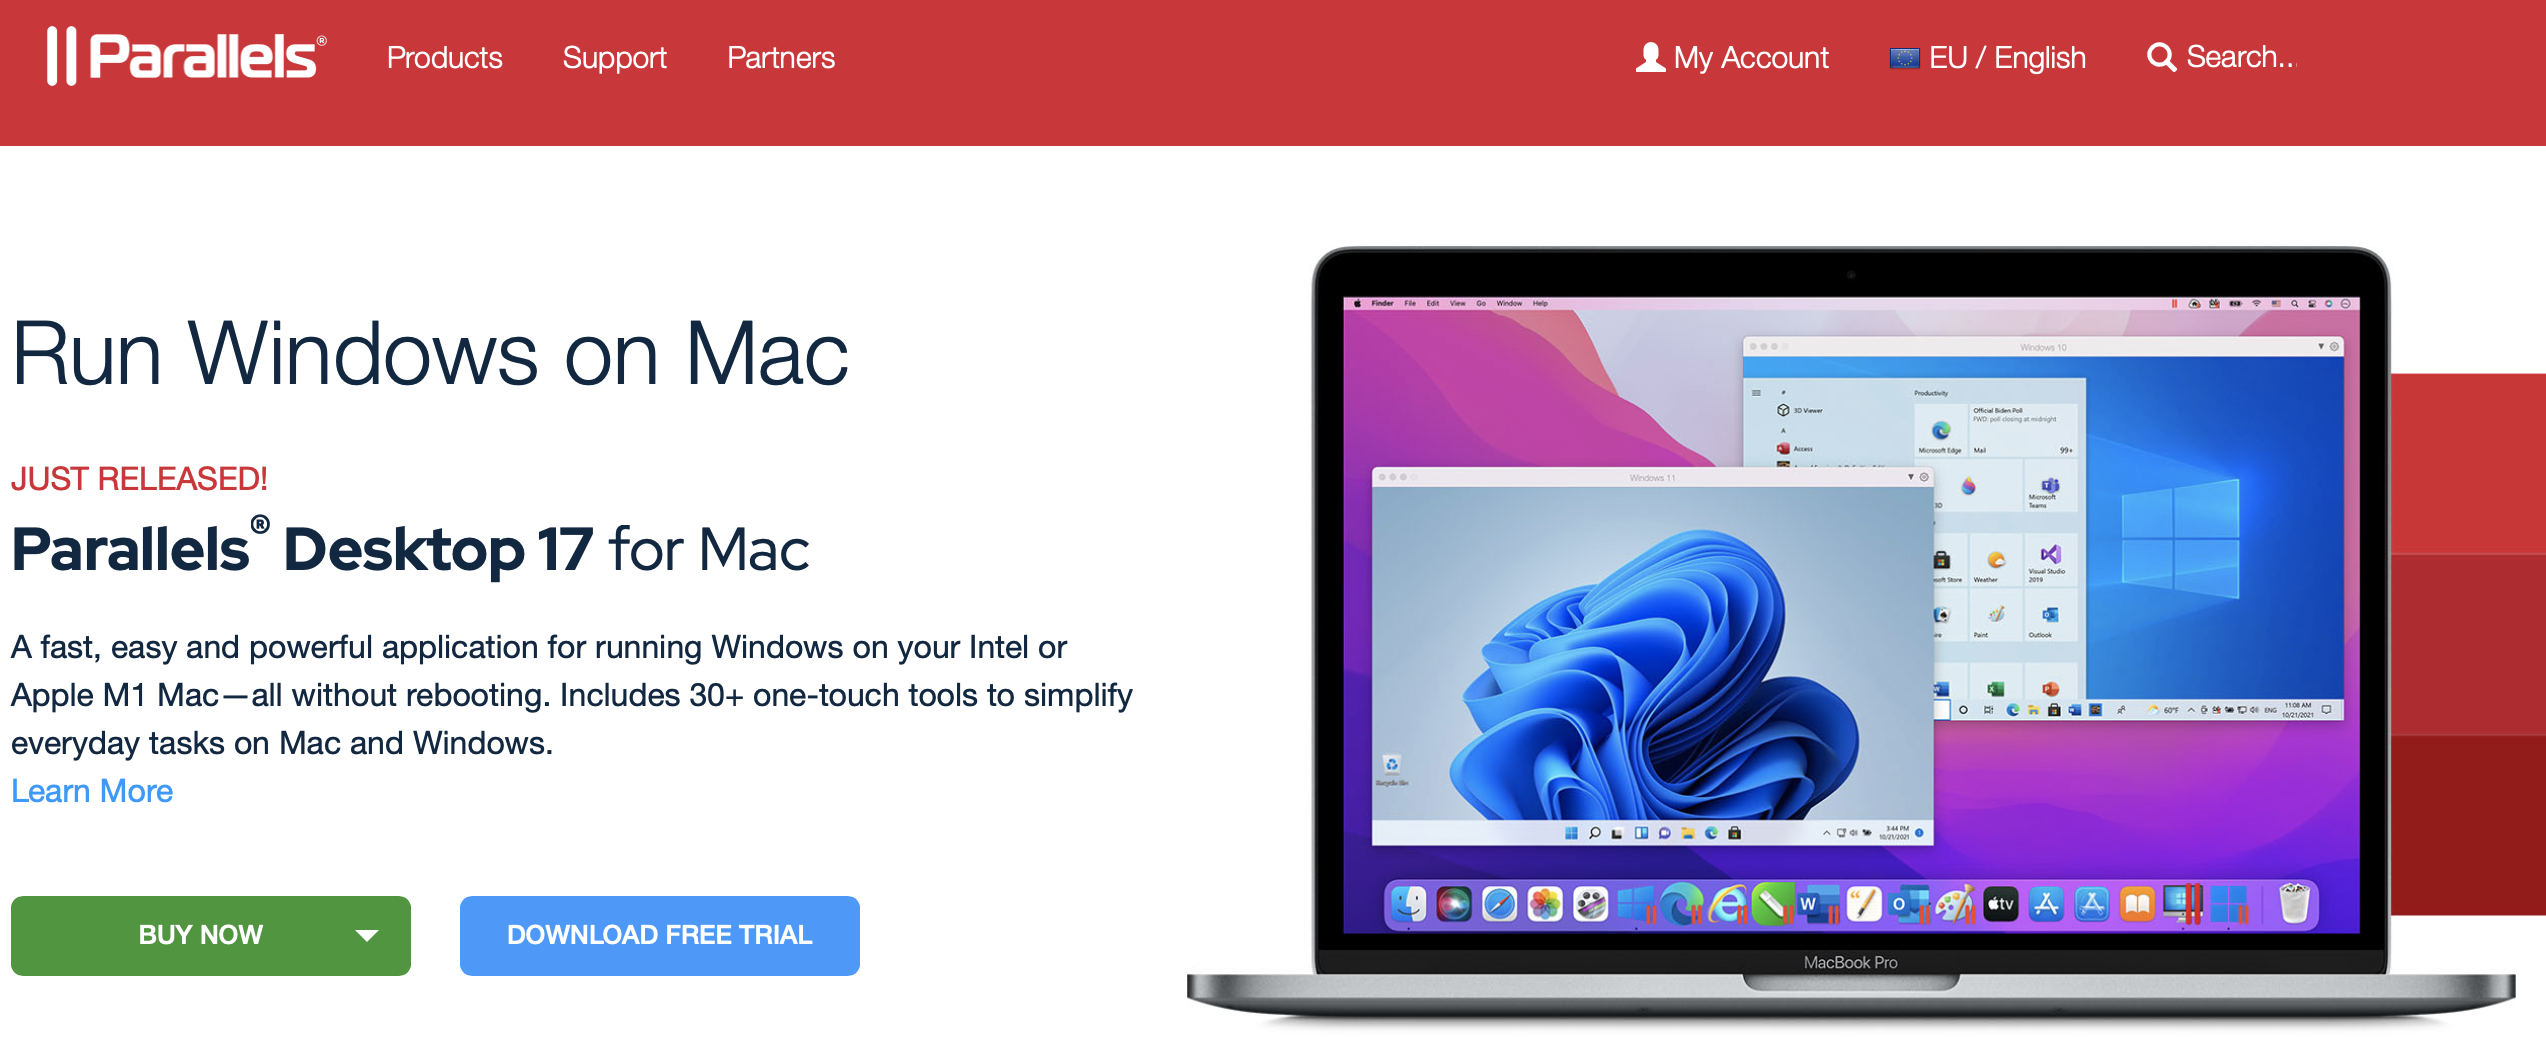
Yous can play Valorant on Mac, but merely if y'all first install Windows on your Mac. The most pop methods of installing Windows to be able to play Valorant on your Mac are using the Parallels virtualization tool or the built-in Boot Camp Banana app.
Unfortunately, for Mac users who wish to run Valorant on their machines, at that place isn't an official way of doing so. Furthermore, the game isn't available on popular cloud gaming platforms such as Boosteroid and GeForce Now, and so playing it in this way is besides not an option. This actually leaves you with the only variant of emulating Windows on your Mac in society to be able to download and run the Windows version of Valorant. The methods we recommend for this are to utilize Parallels or Boot Camp. Annotation that the latter pick is merely for Intel Macs, so if yous are with an M1 Mac model, the only mode you can get this game running on it is to use the Parallels software to create a Windows eleven VM (virtual machine), and then download Valorant in that VM.
Almost Valorant on Mac
Valorant cannot officially exist played on Mac computers, since the game is exclusive to the Windows Os and doesn't have versions for whatever other platforms or operating systems. That said, yous may still be able to play Valorant on your Mac via a workaround method.
Valorant is a pop free-to-play multiplayer FPS (Commencement-Person Shooter) game released in 2020 and developed by Riot Games – the company behind League of Legends, another immensely popular and well-known gratis multiplayer game.
Editors' Choice: Play Genshin Bear on on Mac
Free to Play
Seeing free-to-play on a computer game these days could evoke some unpleasant associations, seeing as how so many free games (or other complimentary software for that matter) present are actually blatant scams that are designed to depict in users with promises of engaging gameplay that can be enjoyed for costless only to before long reveal themselves as cheap and low-quality rip-offs of actual legitimate games that offer nix gameplay and shamelessly use Pay-to-Win mechanics in order to be remotely playable.
Well, if you lot are worried that this may be the case with Valorant, you'd be pleasantly surprised that this is a game that is really free-to-play and does have a lot to offer in terms of gameplay, operation, player base of operations, etc. Similar to League of Legends, there are in-game purchases that utilise existent money, but those purchases are corrective in their nature (mainly weapon and player skins). Those in-game purchases, however, do not affect the gameplay and are entirely optional. Fifty-fifty without buying anything, you would all the same go the full experience of playing Valorant.
The game itself is reminiscent of Counter Strike: Global Offensive, which is besides gratuitous-to-play, and many gamers have bashed it for being too like to information technology – this is in fact one of the almost common complaints/criticisms that gamers have regarding Valorant. However, different CS:GO, the characters you lot can play as in the Valorant are unlike non only in their appearance but likewise in the unique skills that each of them has, which also makes the game similar to Blizzard'south Overwatch. In the cease, information technology comes downward to personal preference which game you'd enjoy more, but it'due south definitely worth giving Valorant a try if you are interested in FPS games and take some time to spare in order to gear up everything up on your Mac and so that you lot'd exist able to run the tame on it.
How to download Valorant on Mac?
To download Valorant on Mac, you first demand to install Windows ten on the computer and so download the game in its Windows 10 partition from the official page of the game. If you try to download Valorant on Mac without having Windows installed, you won't exist able to play the game.
Unlike League of Legends, which had a version for macOS for quite some time and can easily be played on Mac computers without any issue, Valorant, for the fourth dimension being, isn't playable on Mac systems, at to the lowest degree not officially. In fact, information technology seems that Valorant isn't coming to Mac anytime soon. Furthermore, the game isn't available on Google Stadia or GeForce Now – popular cloud gaming services that can allow Mac users to play games that don't have macOS versions. Still, does this hateful that Mac users who would like to play the game would need to go a Windows PC for that specific purpose? Maybe not.
To get the game running on a macOS auto, Mac owners who really want to play it would have to spring through several hoops in order to get the chance to practice and then (and even and then the results would probable be worse compared to the native experience). Still, there's a way to go this game running on your Mac and, considering that Valorant doesn't have the highest system requirements for a 2020 game, even Macs that aren't incredibly powerful should be able to run this game with okay performance.
Valorant Set Up Methods
| Methods | Advantage | Disadvantage |
| BootCamp | – Free to use any time – Windows 10 Environment | – Painful Setup – Mediocre Functioning – Only Compatible with Intel Macs |
| Parallels Virtual Automobile | – Like shooting fish in a barrel Set-upward – Adequate Performance – Play almost any PC game – Windows 11 environs – Compatible with M1 and Intel Macs – 14 day free trial | – Yearly Fee |
How To Play Valorant On Mac M1 And Intel
To play Valorant on Mac M1, you will need to use the Parallels virtualization tool to create a virtual Windows 11 machine on your Mac. Adjacent, to play Valorant on Mac M1, you volition need to download and install the game on the virtual machine.
The Boot Campsite Assistant method shown on this page is not bachelor for M1 Macs, so an alternative to it is the Parallels virtualization program that basically allows you to run Windows on your Mac every bit if the Windows OS is just some other app. In the Windows virtual machine, yous should be able to download and play any Windows game, and so long as your Mac meets its recommended system requirements. Beneath, you lot will learn how to employ the Parallels programme to create a Windows virtual machine (VM) on your M1 Mac.
- Offset, visit the Parallels site and download the free trial version of the plan.
- Install Parallels by opening its .dmg file, double-clicking on Install Parallels Desktop, and following the prompts.

- Once you lot get to a screen that asks you if you want to purchase the full version of Parallels, click Continue.
- Next, create a Microsoft business relationship from here and then visit this page and click Annals under Meet the Windows Insider Program.

- Log in with your Microsoft account, then click Register once again, and after that select Flight Now/Showtime Flighting.
- Open this link, click the ARM Insider Preview download button, and download the file on your Mac. If no download button is available, click the login icon in the height-right and log in using your Microsoft account.

- One time the file is downloaded, double-click it and Parallels should automatically recognize it and use it to begin the installation.
- Choose the Games Only option in Parallels, on the next page bank check the Customize box, and click Create.
- In the Configuration window that should open at present, go to Hardware > CPU & Memory, unlock those settings, click Manual, and allocate as much RAM and CPU equally you are immune to, to the VM.

- Close the Configuration window and click Create. Now all y'all need to do is wait and click OK on the different prompts that show upwardly. Soon the VM will be installed.
- Finally, one time the VM is ready, we recommend going to its First Menu > Settings > Update & Security > Windows Update and installing any updates that may exist pending, after which you lot should restart the virtual machine. After the restart, if Parallels starts installing whatsoever tools in the VM, let the installation stop and restart the virtual machine one more time.
And there you have it – if yous have followed those instructions, you lot should now have a working Windows 11 virtual auto on your Mac. All that's left to do now to get Valorant running on your machine is to open the Windows VM, go to the game's official site, download the game from in that location, and start playing.
How to play Valorant on Mac Intel?
To play Valorant on Mac, you must use a workaround method that involves using the Boot Camp Assistant tool in gild to install Windows 10 on the machine. You should be able to play Valorant on your Mac one time yous have Windows 10 on it.
The process of downloading and installing Windows 10 on Mac is totally free, merely it must be said that it can be rather fourth dimension-consuming and a bit confusing if yous are non a very experienced Mac user. We will guide you through each step, and we will also answer any questions you may have regarding the process in the comments department down below.
Some other affair that should be said before we start the guide is that, since this isn't an official method of playing the game, it'due south possible that the game may not run as smoothly as if you'd play it on an bodily Windows PC. Other problems may also be encountered. We've made sure to include instructions on how to update everything that yous may demand to run the game from the Windows x sectionalisation on your Mac, only information technology wouldn't exist surprising if you still encounter obstacles while trying to play it.
How to install Windows 10 on your Mac
Earlier you start, there are a few things that y'all demand to cheque. First, make sure that your Mac exceeds the minimum system requirements for Valorant and, preferably, meets the recommended ones. Second, to install Windows 10 on your Mac and then download Valorant in the Windows partitioning, yous volition need to have at to the lowest degree 150-160 GB of free space on your Mac. If those ii requirements are met, then yous can start with the Windows 10 installation.
Here are the system requirements for Valorant:
Minimum
- CPU: Intel i3-370M or better/equivalent
- RAM: 4 GB
- OS: Windows vii/8/10 64-flake
- VIDEO Card: Intel HD 3000
- PIXEL SHADER: 3.0
- VERTEX SHADER: 3.0
Recommended
- CPU: Core i5-4460 or ameliorate/equivalent
- RAM: 8 GB
- OS: Windows 7/8/x 64-bit
- VIDEO Carte: GTX 1050 Ti
- PIXEL SHADER: 5.1
- VERTEX SHADER: five.1
- Defended VIDEO RAM: 4096 MB
And here are the instructions on how to install Windows 10 on your Mac:
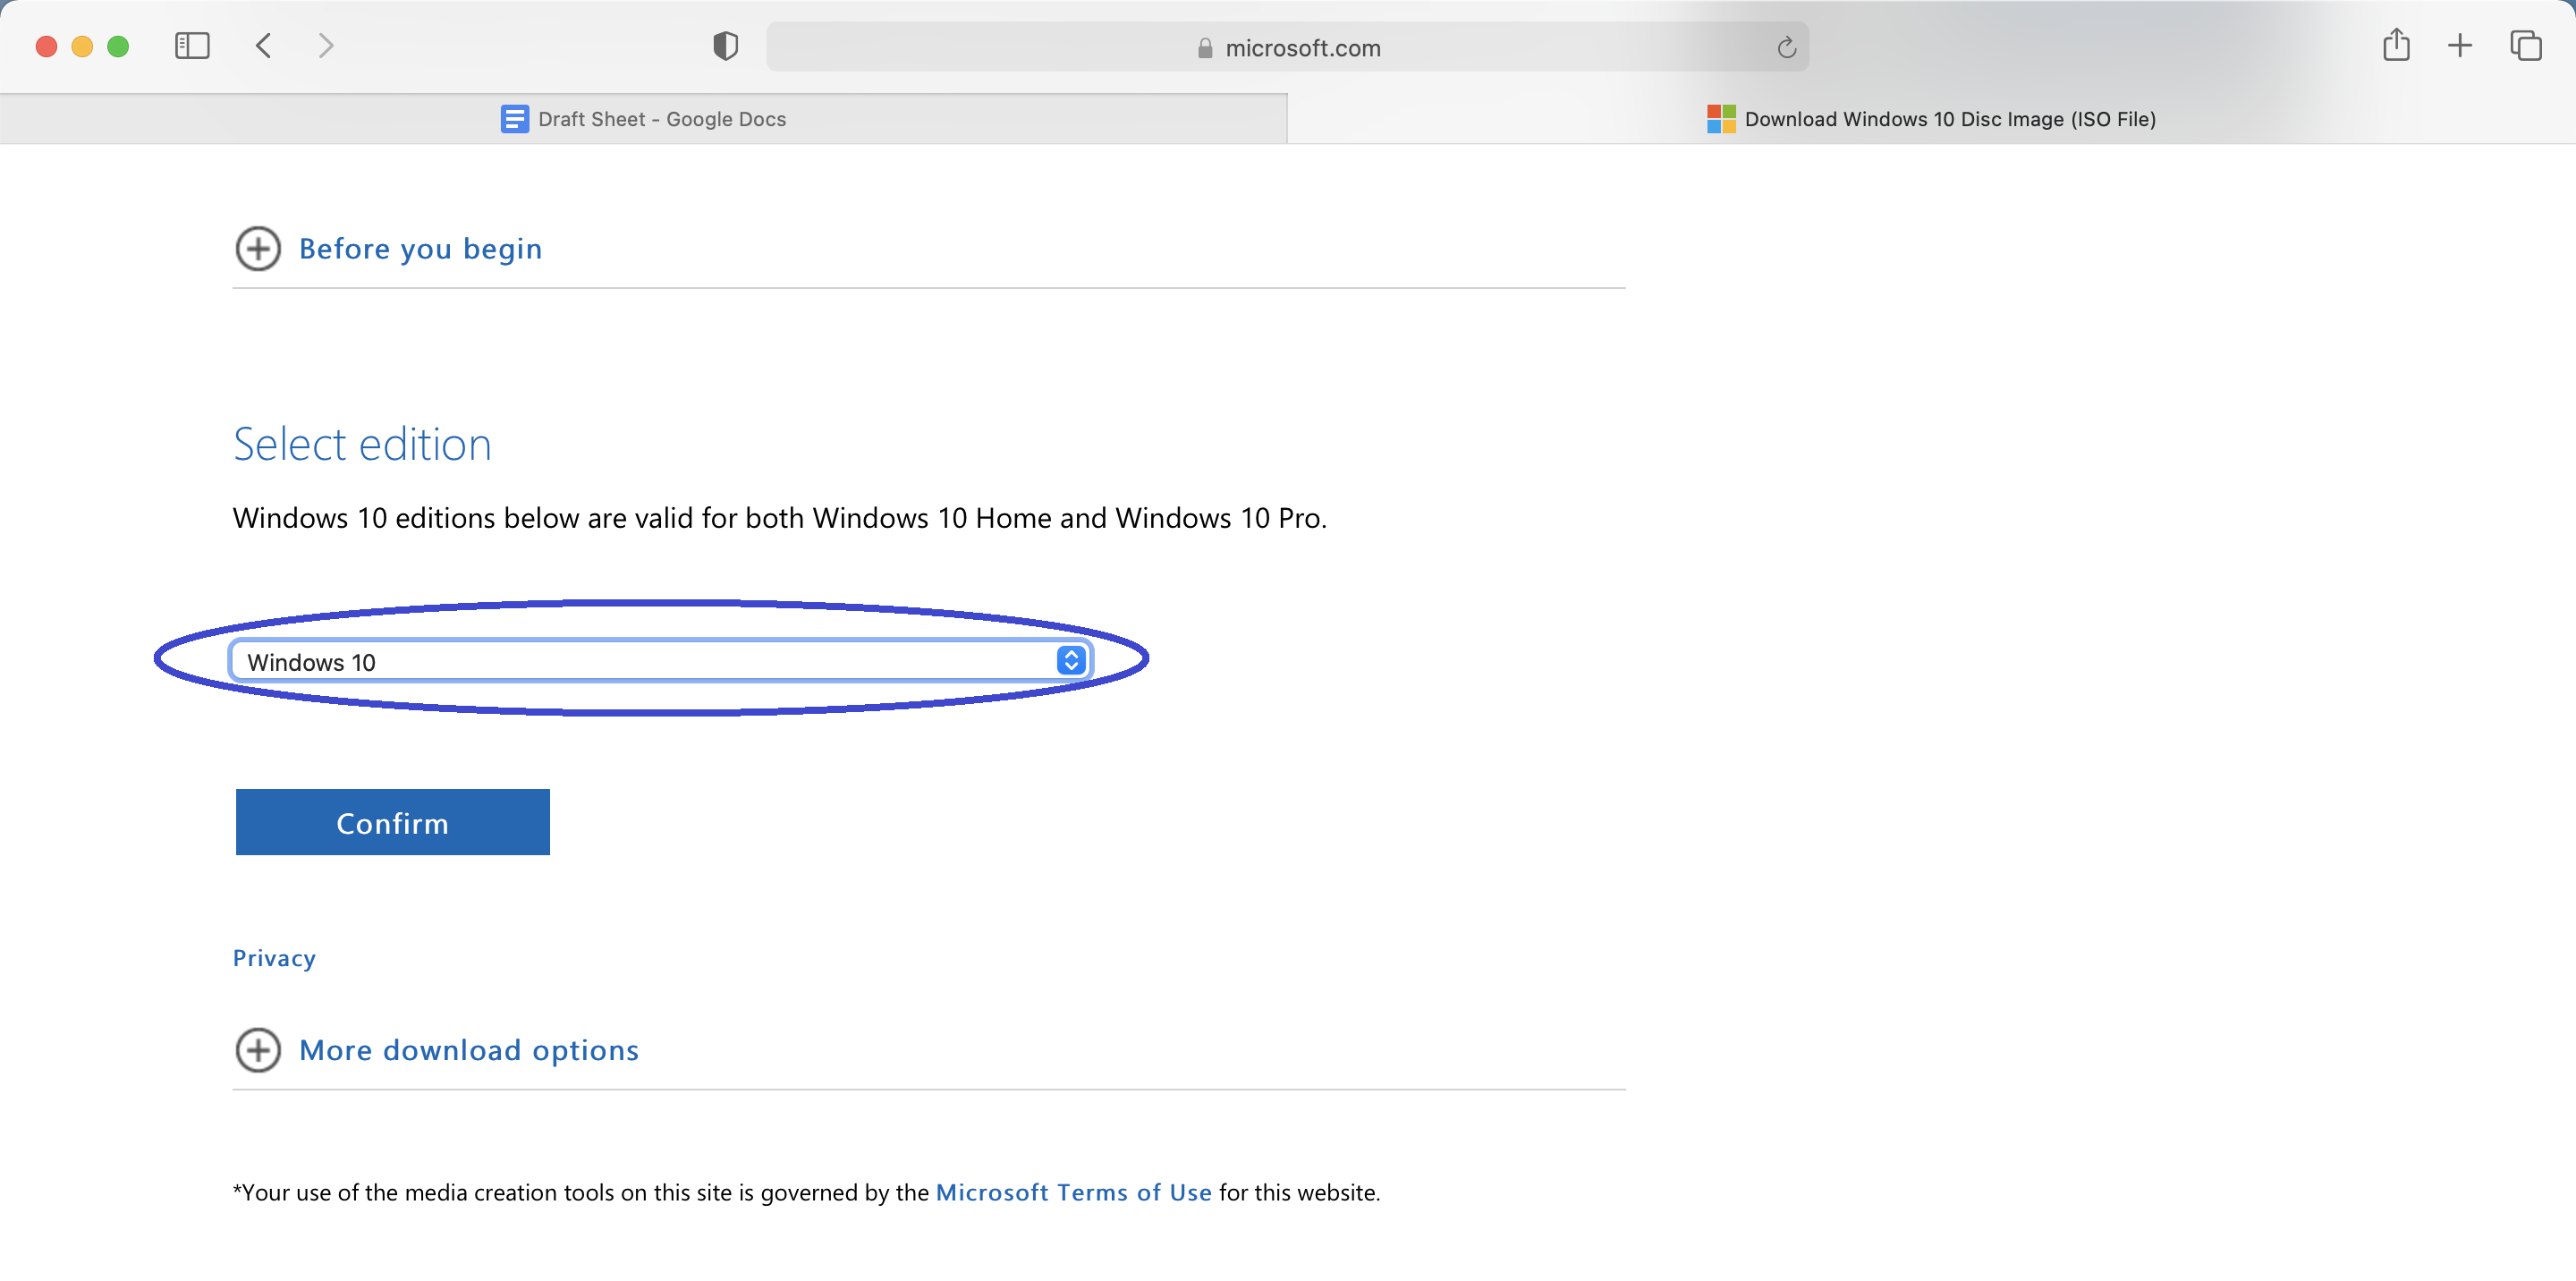
- First, visit this link, select the default Windows 10 variant, and select Confirm.
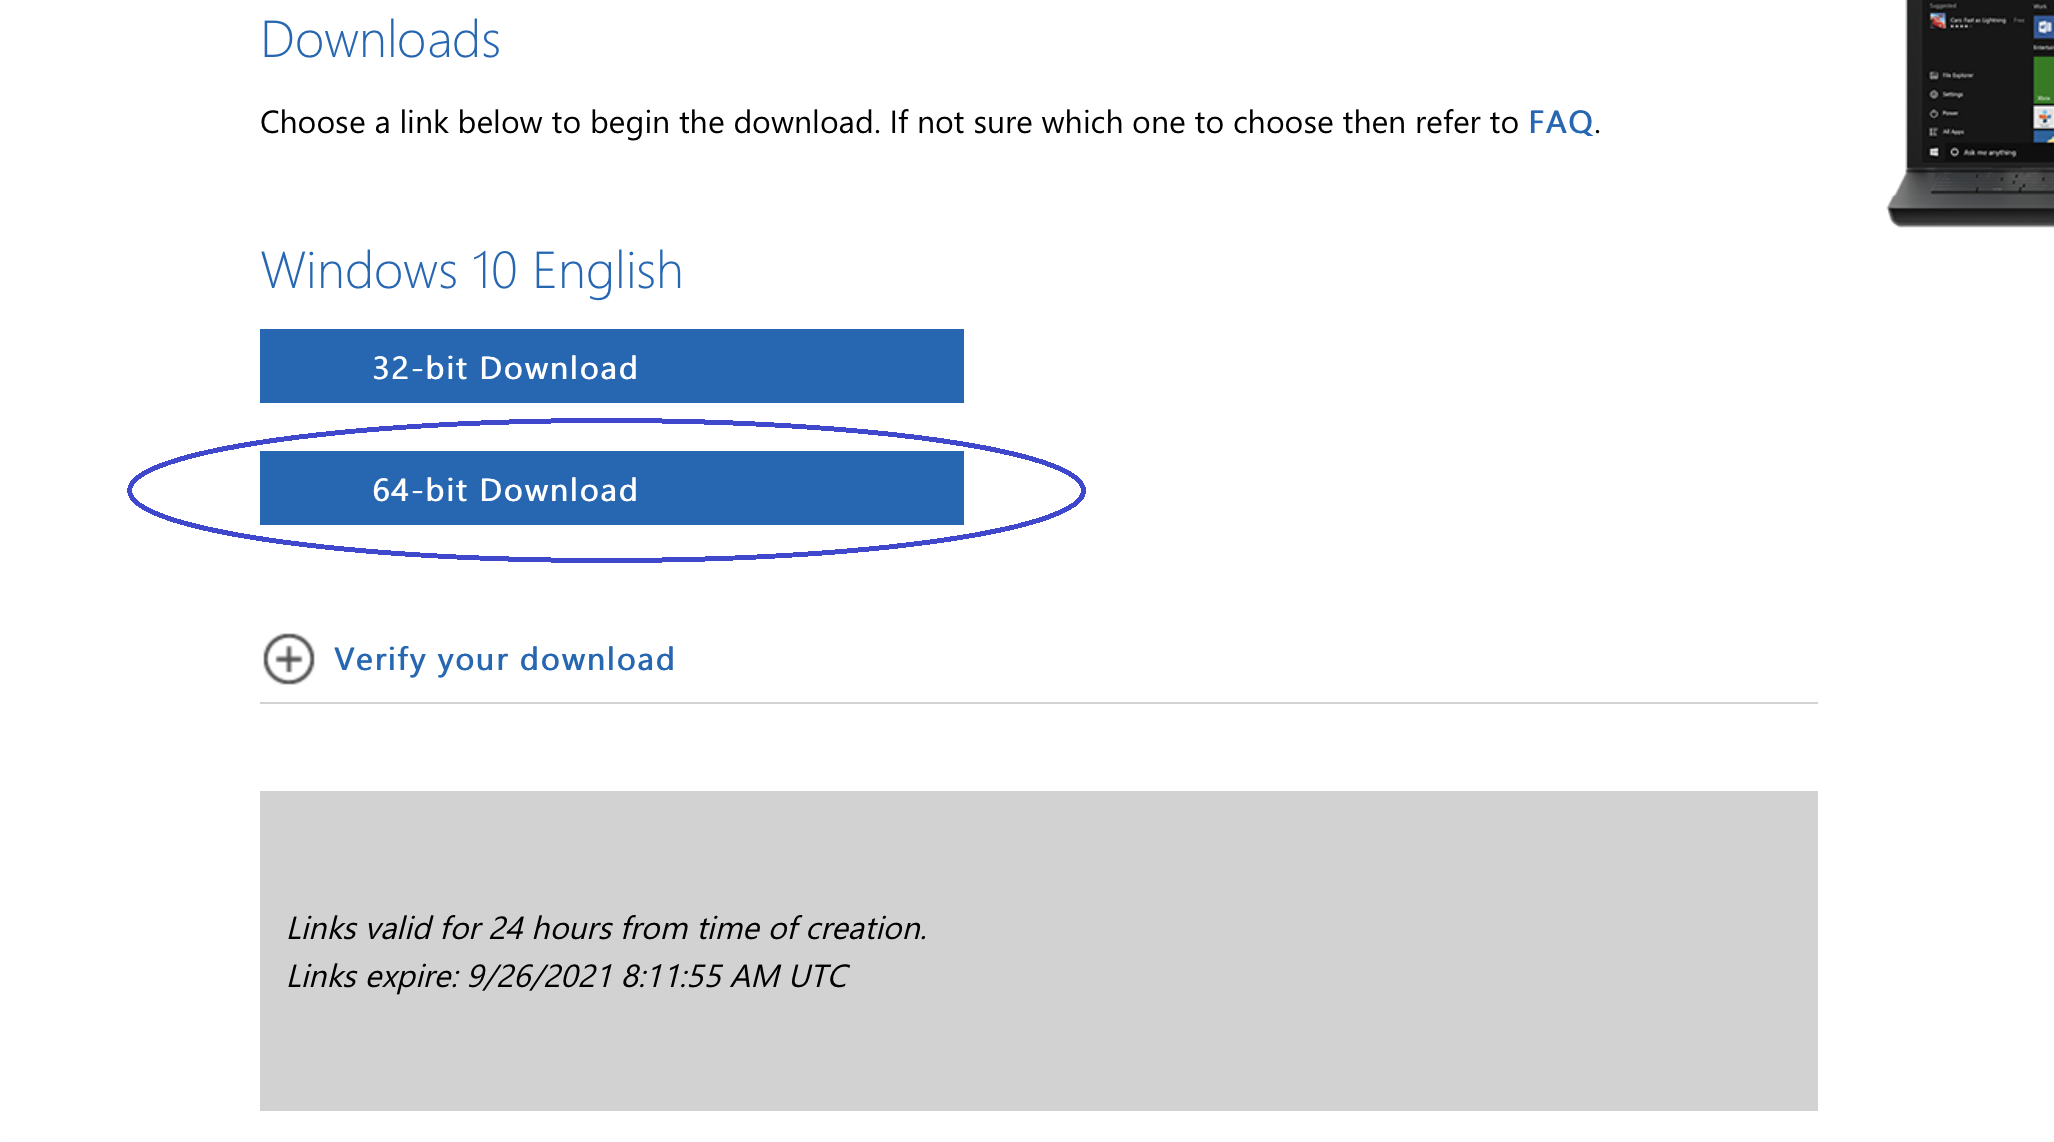
- Next, select the language you adopt, click Confirm again, and click the Windows 10 64-fleck ISO file download button. If your browser tells yous to select a download location, cull your Desktop, if non, the file will most probable end up in the Downloads folder. The file is big, so downloading volition take some time.


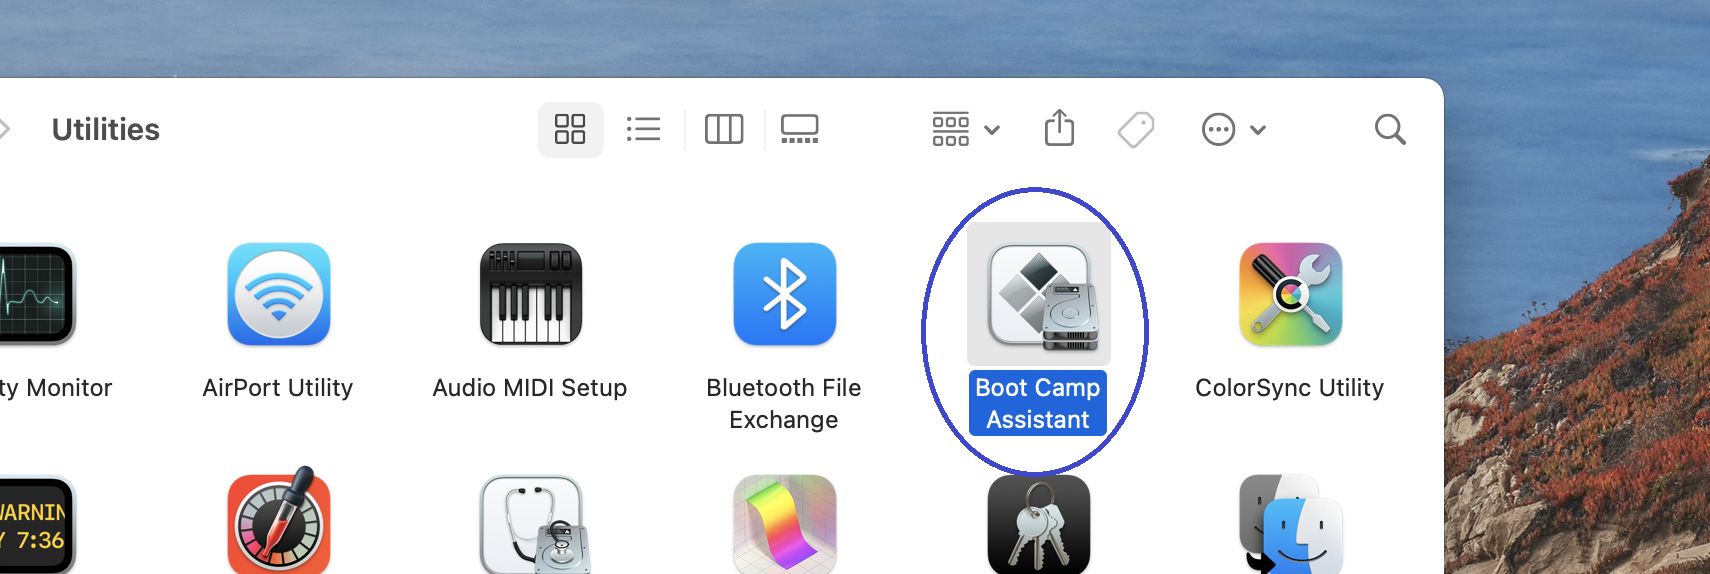
- When the download finishes, click Go from the menu bar, open Utilities, and start the Kick Army camp Banana app.
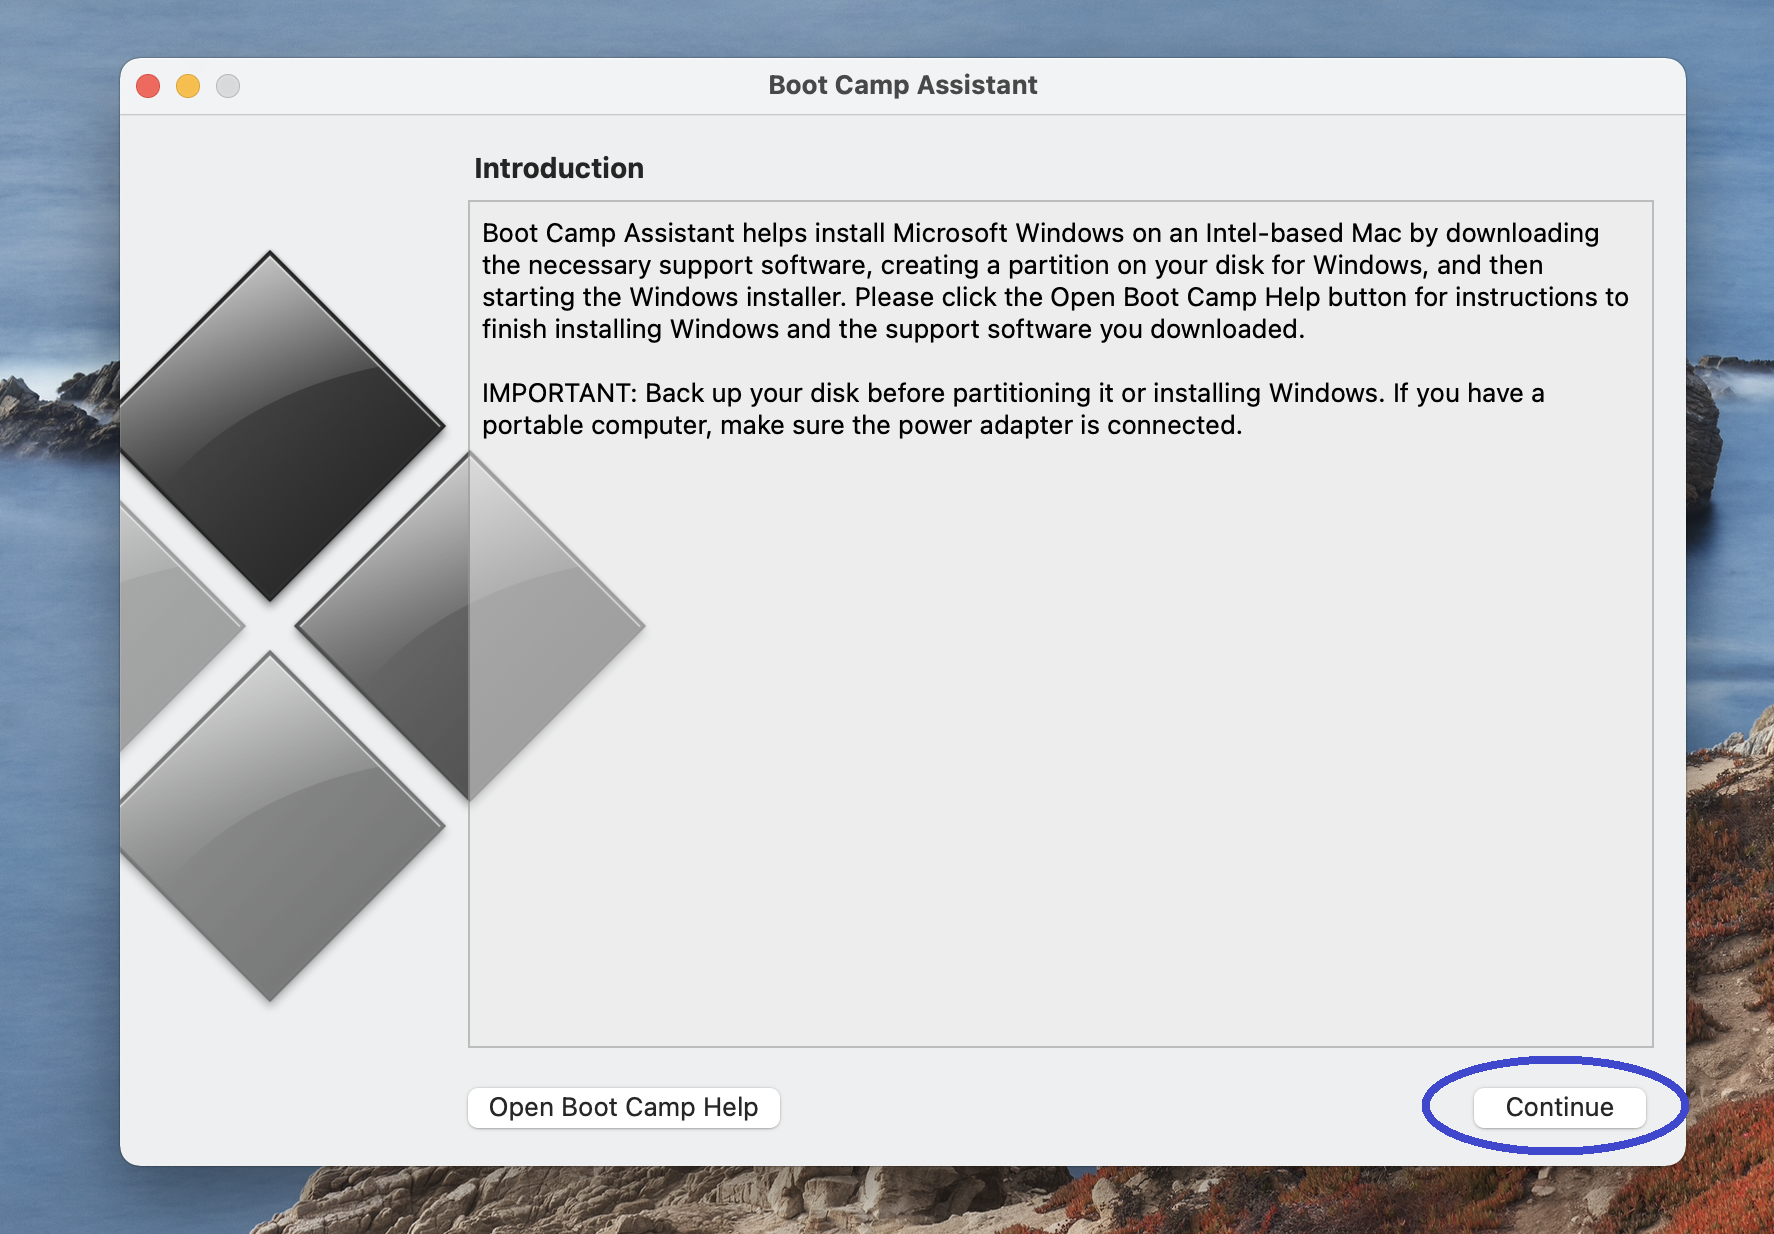
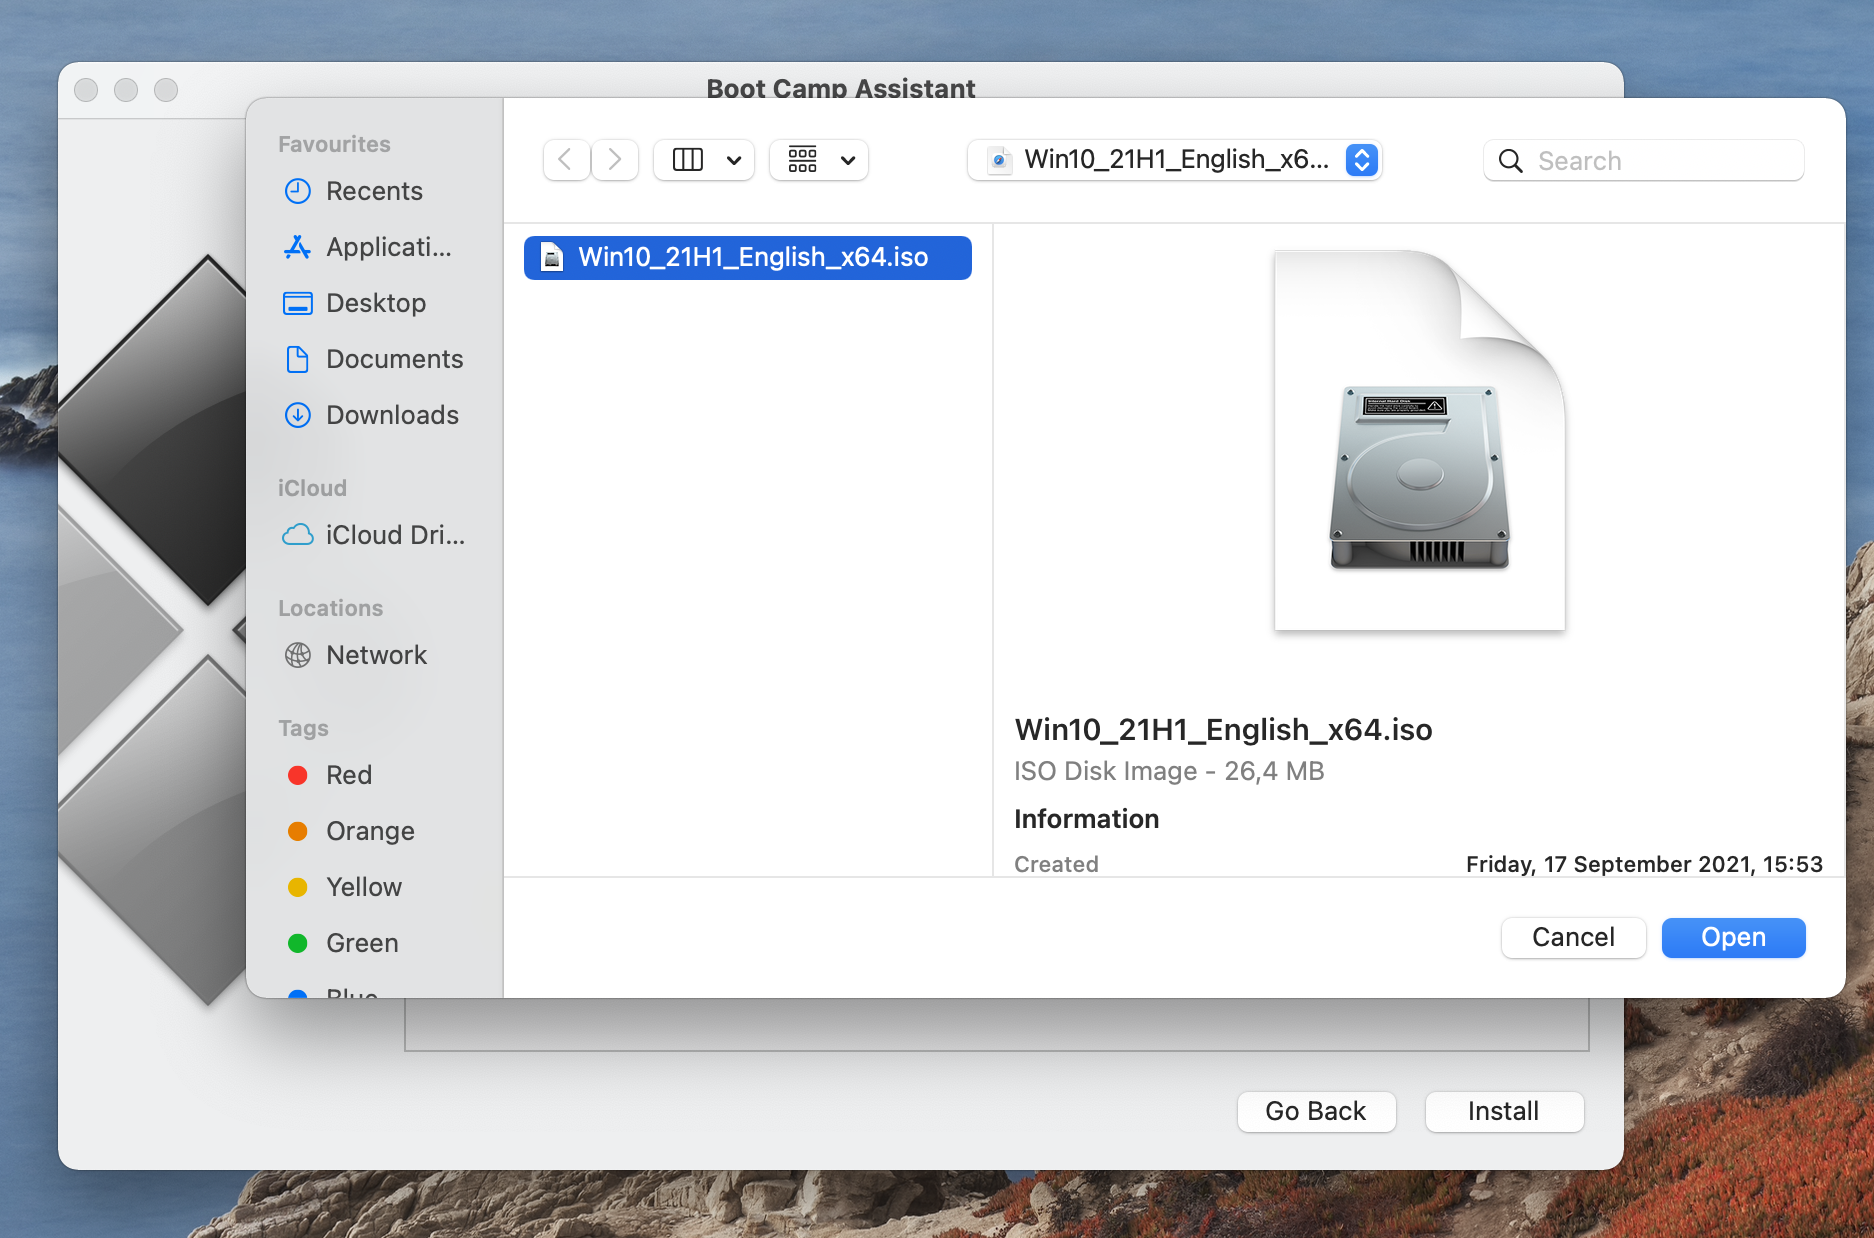
- Click Go along in the Kick Military camp Banana, then click on Choose a Windows 10 ISO file, select Choose, find and click the ISO file you but downloaded from Microsoft, and click Open.
- Next, allocate enough space to the Windows partition by dragging the dot between the ii partitions to the left – give no less than 100-110 GB of space to the Windows but as well brand sure to leave no less than 40 GB for your macOS partition.
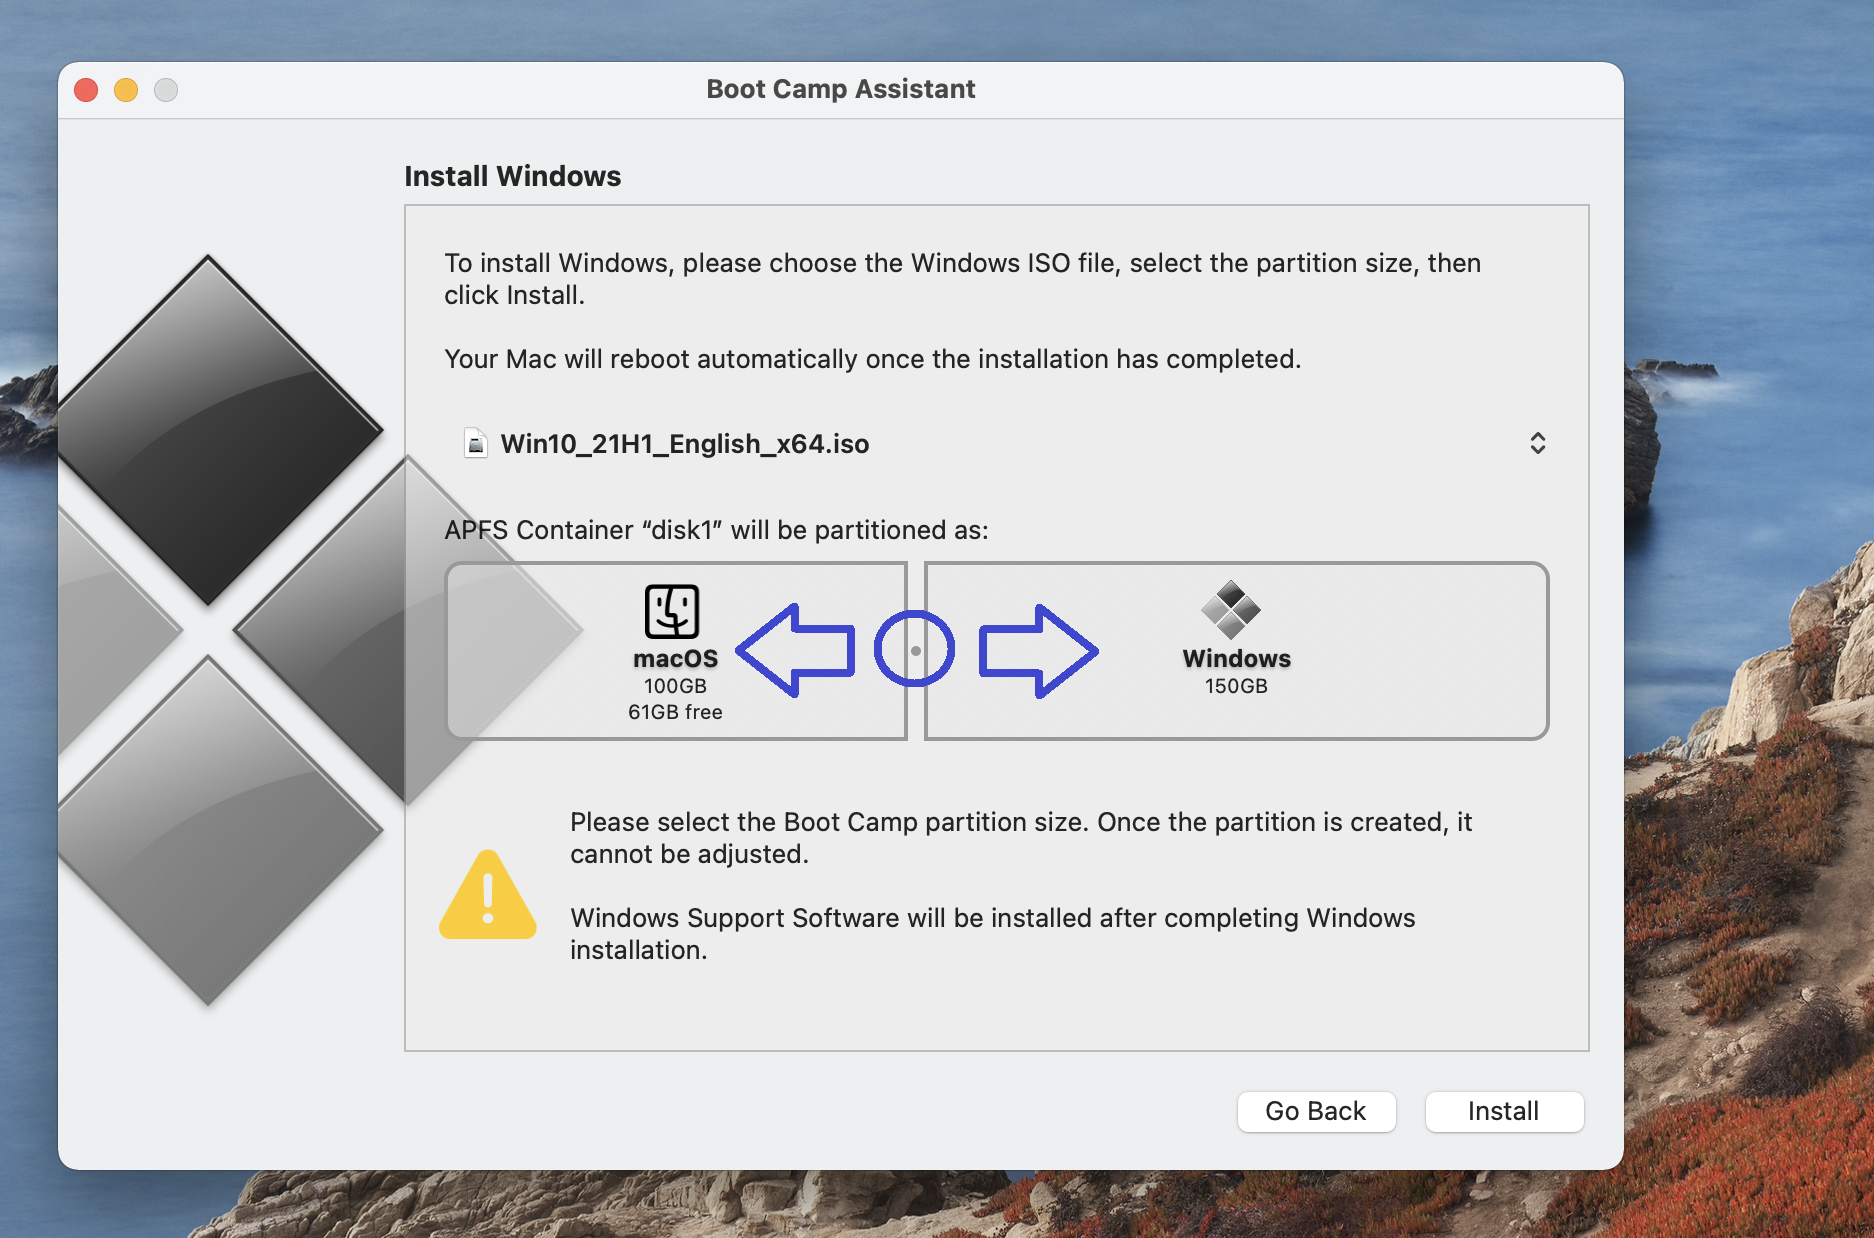
- Next, click install, wait until you get asked to blazon in your Admin password, type information technology, and click OK.
- Your Mac will restart, and after information technology does, y'all volition run across the Windows 10 logo and will exist asked to pick a language and location, then go ahead and exercise that, and and so click Next.
- When you get to the Product cardinal screen, type in your production key if yous have one and select OK. If you don't accept a key, simply select Skip/I don't have a product key.
- If the adjacent screen asks y'all what Windows 10 edition you'd like to install, pick the Windows 10 Home edition, unless you specifically want the Pro edition. If y'all are installing Windows simply to play games, there's no demand to get the Pro variant.
- Once you are done with everything, click I Hold and so click on Adjacent – this will launch the Windows 10 installation – be patient during the process every bit it volition probably take a while to complete.
- Afterward the Windows x installation is finished, the computer will restart and kicking into the Windows 10 Bone. Since this will exist the offset ane you are inbound Windows on your Mac, you lot will have to prepare upward the settings of the OS – y'all can choose between using the default settings or customizing Windows x co-ordinate to your preferences – we advise you to take the fourth dimension to customize the settings rather than using the default ones.
- Afterward you are done with the Win ten settings, you will take to create a Windows business relationship for your Mac – simply type in a username and a password (creating a password isn't necessary and tin can be skipped, but we still recommend that yous create one).
- On the next screen, choose whether you'd like to actuate and customize Cortana (the Windows 10 virtual banana) at present or exit this for later. Pick the selection you prefer.
- After the Siri screen, your Mac should finally load into Windows, just there are notwithstanding a couple of things to do. Once Windows loads, you should see the Kick Camp Banana open on your screen – click the Next push button in the app, so select I Take, and click Next again. A process of installing Mac drivers for Windows should start, and you volition likely be required to give your permission to install some of the drivers on multiple occasions. Click Yes whenever this happens to perform the installation and when the process is finished, select Finish and your Mac will restart again.
- When you kicking back into Windows, click the Start Menu (push-left, then get to Apple Software Update, and your Mac will automatically starting time searching for Apple tree updates and install annihilation it finds. Over again, if you lot are asked for your Admin permission for something to be installed, agree to the installation, and once everything is installed, click Yep when asked whether you'd similar to restart the computer at present.
- One concluding series of updates remains – when the reckoner boots support, become to the Start Card > Update & Security > Windows Update, wait for Windows to automatically await for software updates for the Bone and to install them. This will probably take some time, so be patient. One time this procedure is finished, click on the Restart Now button that shows upwardly and once your Mac restarts, everything should be fix for yous to download, install, and play Valorant on it.
How to switch between the 2 operating systems on your Mac
Earlier you download and install Valorant, information technology's important that yous first learn how to switch between Windows 10 and macOS. To go from macOS to Windows, go to the Apple Menu > System Preferences > Startup Deejay. There, click on the padlock and select Unlock. Afterwards that, click the Bootcamp Windows icon, and click Restart.
To go back to macOS in one case you are in the Windows 10 sectionalisation, locate a small icon in the shape of a tilted/slanted square that should be located in the bottom-right and click it. If you don't encounter such an icon, click the arrow icon that'south pointing up in the bottom-correct, and then you should run across the square icon in the box that appears. One time y'all select the foursquare, click on Restart in macOS, and ostend the command.
How to download Valorant
Once yous have Windows 10 installed on your Mac, downloading and playing the game is really quite unproblematic. Just become to the official page of the game, click Play for Free, create yourself an account or sign in if you already accept an account, and click Download to download the installer for the game. Next, observe the file you lot downloaded (it should be saved to the Downloads folder by default – you can find that folder by searching for it in the Start Card), open that file, and follow the steps in the installer to install Valorant on your Mac. Afterward this is washed, a shortcut for the game should appear on your Desktop (provided that you cull not to create a shortcut) – you can use that shortcut to start and play the game.

Is There Valorant For Mac,
Source: https://macresearch.org/valorant-mac/
Posted by: flowerswhooth.blogspot.com
0 Response to "Is There Valorant For Mac"
Post a Comment